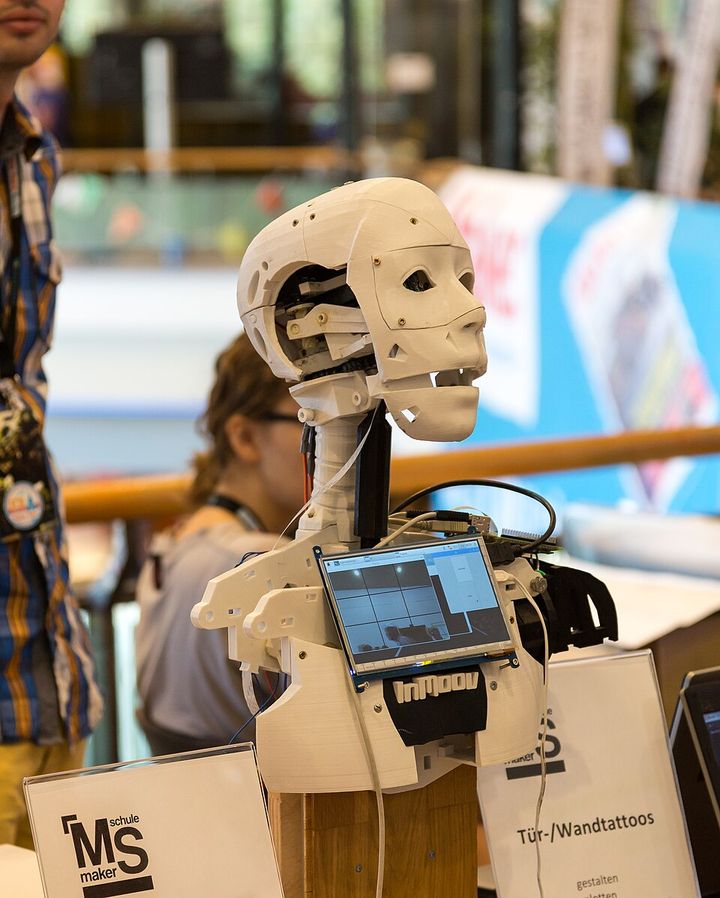
InMoov is a life-size humanoid robot that anyone can build at home. Its plastic body is made on an ordinary desktop 3D printer, small motors move its fingers, arms, head and eyes, and free software on a computer gives it sight, speech and gestures. All of the design files are shared openly online, so builders around the world can print, change and improve it.[1][29]
1. What InMoov is
In short InMoov is a free, human-sized robot design. You download the parts, print them in plastic, add motors and a small control board, and run it from a computer.
The project's own site describes InMoov as "the first Open Source 3D printed life-size robot", designed to be "replicable on any home 3D printer with a 12x12x12cm area" and intended as "a development platform for Universities, Laboratories, Hobbyist, but first of all for Makers."[1] A maker is someone who builds things themselves as a hobby, usually with tools such as 3D printers and small electronics boards.
Four ideas sit behind the project:
- 3D-printed. A 3D printer builds a solid object layer by layer from melted plastic thread (called filament). Every structural part of InMoov is printed, in pieces small enough for a printer whose working space is 12 × 12 × 12 cm (about 4.7 inches each way).[1][2]
- Life-size. The arms, hands and head are roughly the size of an adult's, which is why a full robot needs hundreds of printed parts (see section 7).
- Open source. Open source means the design files are published for anyone to study, copy and modify. InMoov's printable part files (called STL files, the standard 3D-printing file format) are free to download from the project's gallery.[2][36] The licence forbids commercial use (see section 8).
- A platform. InMoov is not a finished product with a single purpose. It is a body that people use to experiment with robotics, prosthetic hands, vision, speech and artificial intelligence.[1][29]
You do not have to build all of it. The project is split into body sections, and the designer suggests you can "start by whatever you want"; many people build only a hand, or a head and torso.[2]
More: what InMoov can do once it is built (abilities and limits)
With the standard software (MyRobotLab, section 6) a complete InMoov can track faces and objects with its eye cameras, speak through speakers with its jaw moving in time, listen for voice commands, and play back recorded gestures with its arms and hands.[7][29] Sensors such as a motion (PIR) sensor, ultrasonic distance sensors and finger pressure sensors let it react to people nearby.[3] The English Wikipedia article summarises it as able to "perceive sound, see, speak and move independently".[29]
Limits are just as important to understand. The standard design is an upper body: it does not walk. The legs in the official tutorials are non-motorised, and builders usually mount the torso on a pole stand.[10][26] The hands can grip light objects, but the printed plastic and hobby motors are far weaker than a human arm.
2. Who designed it
In short InMoov is the personal project of a French sculptor and designer. He started with a single robotic hand in early 2012 and kept adding body parts.
The InMoov site introduces the project's designer as "a French sculptor and designer" who has worked "for the biggest brands since more than 25 years", and says InMoov "is his personal project".[1] He designs the parts in Blender, a free 3D modelling program more often used for art and animation than for engineering; for that reason he does not publish engineering CAD files (CAD, computer-aided design, is the software engineers use to draw precise parts).[4][5]
He also states that InMoov "is not a company, it's a personal project I share for free".[6] The site's small shop sells a few physical items, such as the Nervo Board circuit board and a finger starter kit, rather than the designs themselves.[42]
3. History and timeline
In short InMoov began as an open-source robotic hand in January 2012. The rest of the body followed over the next few years, and the design is still being updated today with new hands, eyes and heads.
The InMoov site says the project "was initiated in January 2012 as the first Open Source prosthetic hand".[1] A prosthetic hand is an artificial hand for someone who has lost theirs. The timeline below uses dates that can be checked: publication dates of the original files on Thingiverse (a public website for sharing 3D-printable designs) and the dates on which tutorial pages were first posted on inmoov.fr.
- Sept 2011Work begins, according to the English and French Wikipedia articles. Neither article gives a source for this date, and inmoov.fr itself gives January 2012 as the start.[29][30]
- Jan 2012The project starts as an open-source, 3D-printed hand, according to inmoov.fr.[1]
- 18 Feb 2012"Hand robot InMoov" is published on Thingiverse. Its description already mentions a plan "to make a complete robot".[23]
- 11 Mar 2012A left hand follows on Thingiverse.[24]
- 7 Aug 2012One of the first community add-ons appears: an adjustable thumb designed by another builder.[25]
- 25 Jan 2013A stand holder "to fix the torso on a pipe" is published, so the torso existed by then.[26]
- 9 May 2013The eye mechanism is published on Thingiverse.[27]
- Sept 2013Step-by-step assembly tutorials for the finger starter, hand and forearm, bicep, shoulder and torso, neck and jaw, and eye mechanism are posted on inmoov.fr (all first dated 11 September 2013).[4][5][8][9][11][12]
- 2013The original robot is shown at Maker Faire Rome, where, according to Wikipedia, it drew wide interest as a possible basis for robotic prostheses.[29]
- Dec 2013The Hardware Map and bill of materials (the full shopping list) page is first posted.[3]
- 2014–2016The three stomach sections below the chest are documented: top stomach (July 2014), mid stomach (November 2015) and low stomach (February 2016).[37][38][39]
- Feb–Mar 2015The Nervo Board, a dedicated wiring board, is on sale: the tutorial mentions a first batch of 18 boards sold before 17 February 2015, and the tutorial page is dated 24 March 2015.[6]
- Oct 2017Tutorials for the non-motorised legs are posted, and a new neck-tilting mechanism is published on Thingiverse.[10][28]
- Apr 2022A redesigned hand, the "i2 Hand", gets its own tutorial; the site now recommends it over the original hand.[4][14]
- 2024The "i2Head", a new head with a cast silicone skin that can make facial expressions, appears (February–March), followed by new "Eyes i2" (December).[15][16][17]
- 2025Pages for MinMoov, a version scaled to 64 % (June), and for controlling InMoov with ROS, a widely used robotics software framework (August), are added.[18][20]
More: how these dates were checked (and what is uncertain)
- Thingiverse dates come from the "published" date recorded on each design's Thingiverse page.[23][24][25][26][27][28]
- inmoov.fr tutorial dates are the dates each page was first published, as recorded by the site itself. They show when the instructions went online, not necessarily when the part was designed: several parts appeared on Thingiverse months earlier.
- The start date differs between sources. Wikipedia says September 2011 and states that the first files were published in January 2012 on Thingiverse; inmoov.fr says January 2012; the earliest Thingiverse listing that could be found is dated 18 February 2012. The design may have been shared elsewhere first, so this page gives all three.[1][23][29]
- Maker Faire Rome 2013 is from Wikipedia, which does not give an exact date.[29]
4. The parts of the robot
In short InMoov is built in sections: head, neck, shoulders, torso, arms, hands, a "stomach" that lets the body turn, and either printed legs or a simple stand. Each section has its own printed parts and its own motors.
Figure 1 shows how the body is divided. Each numbered section has its own tutorial on inmoov.fr, with a list of the parts to print and step-by-step photos.[2]
Head, eyes and jaw
The head holds the robot's "eyes": two small webcams (digital cameras that plug into a computer) set inside printed eyeballs, so the robot sees what it looks at. Two small motors move the eyes left-right and up-down, and another opens and closes the jaw, so the mouth moves while the robot talks.[3][9] The newer i2Head adds a soft silicone face cast in 3D-printed moulds, moved by 15 small motors to make expressions.[15][16]
Neck, shoulders and torso
Two large motors in the neck nod the head up and down and turn it left and right; in later versions extra motors also tilt it sideways.[3][8][28] The torso is the chest frame that the shoulders, neck and arms bolt onto. Its back covers enclose the control boards, and some builds fit a depth camera (a camera that measures distance, such as a Microsoft Kinect) in the chest.[11][13] Each shoulder has two motors: one raises the arm forward (called "shoulder") and one swings it out to the side (called "omoplate", French for shoulder blade).[11][40]
Arms: bicep and forearm
The upper arm, which the project calls the bicep, has two large motors: one bends the elbow and one rotates the arm.[12][40] For these big joints, builders open the motor, take out its internal position sensor (a potentiometer, a knob-like sensor whose resistance changes as it turns) and mount it on the joint itself on longer wires, so the motor knows where the arm really is.[12] The forearm is mostly a long printed shell that houses the motors for the five fingers and the wrist.[4]
Hands and tendons
In short The fingers have no motors inside them. Like a human hand, they are pulled by "tendons": strong lines that run from motors in the forearm to the fingertips.
Each finger is a chain of printed pieces joined by hinges. A pair of lines runs through each finger and wraps around a pulley on a motor in the forearm: when the motor turns one way it pulls the finger closed, and when it turns back it pulls it open (Figure 2). The site recommends 200 lb braided fishing line for the tendons, because ordinary nylon fishing line stretches over time.[5] The wrist rotates on a separate motor.[3]
More: how many parts in a hand? (original hand vs i2 Hand)
The original right hand and forearm tutorial lists 16 printed parts (one per finger, plus the palm, wrist and forearm shell pieces) and five more for the rotating wrist.[4] The hand page now carries a notice recommending the newer i2 Hand, whose fingers are printed as a single set of five with matching pulleys.[4][14]
The finger motors are the medium-size servos described in section 5. The designer's own ranking of the servos he has tried for the hand starts with JX PDI-6221MG, then HK15298B, HK15298 and the cheaper MG996R, noting that the cheap models are "a bit noisy" and "burn sometimes".[3]
Stomach, legs and stand
Below the chest, three "stomach" sections (top, mid and low) carry large motors that move the upper body at the waist.[37][38][39] The low stomach includes the supports for mounting the robot on a standing pole, a common way to display the robot.[39] Printed non-motorised legs are also available: they let the robot stand on its own feet, but they do not move, and some of their parts are larger than the 12 cm printer limit (one thigh part measures 16.5 × 19.6 × 12 cm).[10]
5. Servos and electronics
In short About 30 hobby servo motors move the joints. Two Arduino Mega control boards, each fitted with a Nervo Board for neat wiring, take commands from a computer and tell each servo where to go. A 6-volt supply powers the motors.
Servo motors
A servo motor (or servo) is a small motor with a gearbox and a built-in position sensor. Instead of just spinning, it turns to a requested angle and holds it, which is exactly what a robot joint needs. Servos are sold by size and by torque, the turning force they can produce (usually given in kg·cm: a 20 kg·cm servo can hold 20 kg on an arm 1 cm long). InMoov uses three classes:[2][3]
| Where | Servo model | Size class | How many |
|---|---|---|---|
| Fingers (5 per hand) | HK15298B | standard size, about 15–20 kg·cm | 10 |
| Wrists | MG996R | standard size | 2 |
| Shoulders and biceps (4 per arm) | Hitec HS-805BB | "giant scale", much larger and stronger | 8 |
| Head: nod and turn | Hitec HS-805BB | giant scale | 2 |
| Jaw | HK15298B | standard size | 1 |
| Neck tilt | HK15298B | standard size | 2 |
| Eyes | DS929HV "or similar" | micro / mini size | 2 |
| Stomach (top and mid) | Hitec HS-805BB (or HK15338 in the mid stomach) | giant scale | 4 |
| Total in this list | 31 |
The list is a starting point, not a rule: the hardware page names many alternatives that fit, and the newer i2Head alone adds 15 small JX PDI-1109MG servos plus 2 larger ones.[3][16] The "build yours" page sums up the core set as "HK15298B, Hitec HS805BB and MG996".[2]
More: alternative servos the hardware page lists (as tested or "should fit")
- Hand: JX PDI-6221MG and PDI-6225MG-300 (the designer's first choices, 20–36 kg torque), HK15298B, HK15298, MG996R, MG946R and MG995 (he notes the last ones "burn sometimes" or "very easily").[3]
- Bicep, shoulder and torso: JX PDI-HV2060MG, Savöx SV-0235MG, HK15338, Hitec HS5805MG, FS6535M and others, with notes on which ones need adjustment.[3]
- Because servos from different makers rotate through different angles, each one has to be given a minimum and maximum position in the software.[3]
Arduino and Nervo Boards
An Arduino is a small, inexpensive circuit board with a microcontroller (a tiny computer on a single chip) that can switch things on and off and send control signals. The Arduino Mega is the larger model, with enough connections (pins) for many servos. InMoov's default set-up uses two Arduino Megas, one for each side of the body (the software calls them "left" and "right"); the earliest set-up used an Arduino Uno and a Mega.[2][3][7]
Plugging about 30 servos straight into two Arduinos would make a tangle of loose wires, so the project's designer created the Nervo Board: a circuit board that sits on top of each Arduino Mega (a "shield" in Arduino terms). It gathers the servo connections into flat ribbon cables that run to the hand, arm, neck, head and stomach, adds connectors for sensors, and brings in the servo power through XT60 connectors (a common heavy-current plug), with up to three different servo voltages if needed.[6] The parts list gives the ribbon lengths from the board, for example 90 cm to the hand and 55 cm to the eyes and jaw.[3]
Power
Servos draw far more current than an Arduino can supply, so they get their own power source. The parts list names a 6 V, 12 Ah battery with a charger (Ah, amp-hours, measures how much charge a battery holds) and says the robot needs only one battery; for running all day, the designer uses a 6 V, 60 A mains power supply instead. If a 6 V supply of that size is hard to find, the page suggests a 5 V unit whose output can be adjusted up to 6 V.[3] Even a single test servo should have its own supply, because a servo powered from the Arduino can make the board reset itself.[5]
Sensors and cameras
Besides the eye cameras, a fully equipped InMoov in the designer's current set-up uses a PIR sensor (it detects body heat, so the robot can notice someone walking up), two ultrasonic distance sensors (they measure distance with sound pulses, like a bat), ten finger pressure sensors, NeoPixel LED rings (strips of individually controllable coloured lights), a depth camera, a USB sound card, a headset and speakers.[3] Each has its own "how to" page on the site.[2]
More: the computer inside (from tablets to a mini PC)
The "brain" is an ordinary computer running MyRobotLab, connected to the Arduinos and cameras through a USB hub. The hardware page describes the designer's latest configuration as a small Intel NUC-style mini PC (8th-generation Intel Core i7, 32 GB of memory) running Windows 10 and Ubuntu Linux, with a tablet used as a wireless screen. An older set-up used an 8-inch Windows tablet mounted in the robot's back. He also tried small ARM boards (an Odroid U3 and a Raspberry Pi 2) and abandoned them because they were too slow to process the camera images.[3]
6. Software: MyRobotLab
In short InMoov is normally run by MyRobotLab, a free program that talks to the Arduinos, the cameras and the speech system, and can even show a virtual InMoov on screen for testing without any hardware.
MyRobotLab (often shortened to MRL) is an open-source robotics framework written mainly in Java, with Python scripting for writing behaviours. It runs in a web browser interface on Windows, Mac and Linux.[7][29][31] Its InMoov module handles the robot's parts as named servos (for example neck, rothead, jaw, bicep, omoplate), so a gesture can be written as a short list of joint positions and speeds.[40] Each servo's safe minimum and maximum positions are set once in the configuration, and the setup page lists nine languages for the voice, including English, French, Italian, German, Russian, Spanish and Hindi.[7] The current release line is called "Nixie".[7]
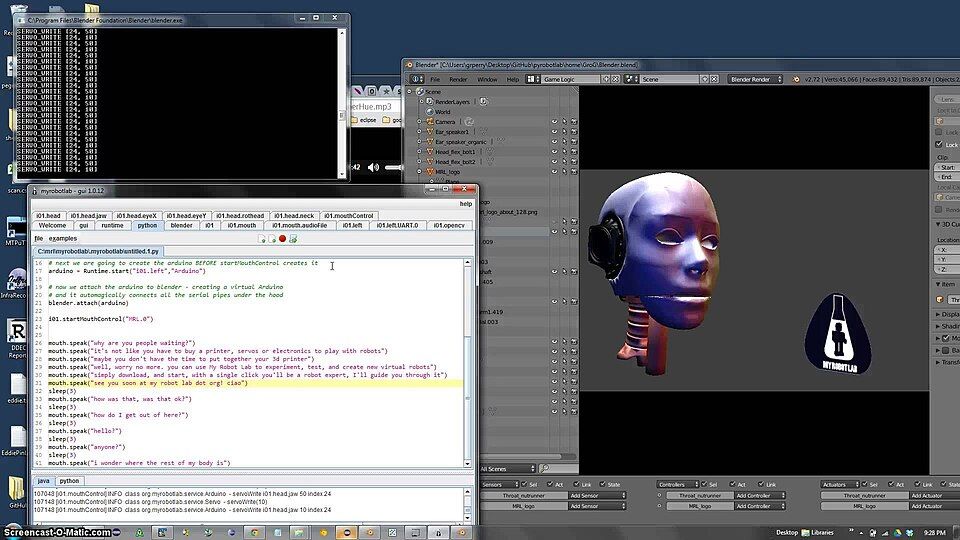
MyRobotLab is not the only option. The inmoov.fr "InMoov with ROS" page collects builders' projects for running the robot on ROS (Robot Operating System, a widely used set of open-source robotics software libraries), and notes that MyRobotLab has a bridge to ROS.[20]
More: getting started with the software (what the setup page asks for)
- The setup page lists Java (JDK 11, 64-bit), the Chrome browser and the Arduino software as prerequisites, then a download of MyRobotLab that installs itself on first launch.[7]
- The site describes MyRobotLab as "a work in progress and in constant evolution", so instructions change between versions; older versions are documented separately on the same page.[7]
- A virtual mode needs no servos at all, and a "right side" mode is enough for testing a single hand or the finger starter.[7]
7. Materials and printers
In short Any printer with at least a 12 × 12 × 12 cm build area can print most of InMoov. The designer prints in ABS plastic; many builders use PLA instead. Expect roughly 10 kg of plastic and well over a thousand hours of printing for a whole robot (estimates).
Printer size
The build volume is the largest object a 3D printer can make in one go. InMoov's parts are designed for a 12 × 12 × 12 cm build volume; the "build yours" page warns that "some parts might exceed of few millimiters", and a few later parts are larger: some leg parts are almost 20 cm long, and the moulds for the i2Head need about a 220 × 220 mm bed.[2][10][16] In a 2019 reply on the site, the designer recommends getting a bigger printer if you can.[6]
ABS or PLA?
The two most common printing plastics are PLA (polylactic acid: easy to print, stiff, but softens at fairly low temperatures) and ABS (the tough plastic used in LEGO bricks: stronger against heat, but it warps unless the printer is enclosed). The "build yours" page says "ABS is better but some guys do it also with PLA", and the designer's own robot is printed in ABS.[2][38] The tutorials give instructions for both: ABS parts can be welded together with a few drops of acetone, which dissolves the surfaces into one piece, while PLA parts are glued with two-part epoxy; for PLA parts that are a tight fit, the site suggests warming them with a hot-air gun.[5][11]
Print settings and estimates
Most tutorials ask for 30 % infill (the density of the inside of a part), 2 to 2.5 mm walls, no raft and, where possible, no support. Builders are told to print the "calibrator" test part first to check that parts will fit together, and to adjust the slicer's horizontal expansion (a setting in the program that prepares files for the printer, often starting around −0.15 mm) if they are too tight.[4][8][12]
| What | Figure | Who says so |
|---|---|---|
| One hand and forearm | about 750 g of plastic; "15 to 20 euros of ABS" | The designer, in a reply on the hand page (March 2014), from memory[4] |
| ABS in the parts list | 1.5 kg for the hands and forearms, 1.5 kg for the arms and shoulders, "about 4 kg" for the head and torso | Hardware Map parts list[3] |
| The whole robot | about 10.2 kg of filament, 320 parts, about 1,383 hours (57.6 days) of printing | a builder's own calculation from the design files, posted on the finger starter page (June 2018); not checked by the project[5] |
Real print times vary enormously with the printer, layer height and speed. Treat these as rough orders of magnitude: a full InMoov is many weeks of round-the-clock printing on a single printer.
8. The licence
In short InMoov is released under the Creative Commons Attribution-NonCommercial licence (CC BY-NC). You may copy, print, modify and share it, as long as you credit its creator and do not make money from it.
A Creative Commons licence is a ready-made set of permissions a creator can attach to their work. InMoov's pages state the licence repeatedly: "InMoov design is under a CC-BY-NC license", "InMoov is under CC-by-NC licence. No commercial usage."[6][13] The two parts mean:
- BY (Attribution): you must credit the creator (the InMoov designer).
- NC (NonCommercial): you may not use the work mainly for commercial advantage or money.[32]
The designer's own summary is that you "can modify the stl parts and share for non commercial profit under the same terms of license as long as credit and attributions are given", and that students may use InMoov for study projects as long as they respect those terms and the project is strictly non-commercial.[4][5] The MinMoov scaled files carry the same licence.[18]
More: which version of the licence? (4.0 on Thingiverse; one later part differs)
- The inmoov.fr pages say "CC-BY-NC" without a version number.[4][6][13]
- On Thingiverse, the original hand, left hand, stand holder and eye mechanism are listed as CC BY-NC 4.0.[23][24][26][27] (Thingiverse shows the licence currently recorded for each design; it is not clear from the page which version was chosen in 2012.)
- One later part, the 2017 neck-tilting mechanism, is listed on Thingiverse as CC BY-NC-SA 4.0, which adds ShareAlike: changed versions must be shared under the same licence.[28] The designer's "under the same terms" wording above points the same way, so the safest reading is to share any remix of InMoov under the same non-commercial terms.
- Parts designed by other builders carry their own licences, which vary (for example CC BY 4.0 or CC BY-SA 4.0 on some community add-ons). Check each file you use.
- The photos on this page are not InMoov design files: each is used under the photographer's own licence, credited in the caption and in Image credits.
This is a plain-English summary, not legal advice; the licence text on the Creative Commons site is the authority.[32]
9. Community and derivatives
In short Hobbyists, schools and labs around the world share their builds, fixes and remixes through the InMoov forums, a Discord server and Thingiverse. The design has also inspired prosthetic-hand projects and smaller versions of the robot.
Where builders meet
The inmoov.fr site links to an English forum, a French-language forum and a Russian forum, a Google Groups forum, a Discord server (a chat service), an events calendar, a photo and video gallery, and a world map, made by a builder, on which InMoov builders can mark their location.[1][33][34][35][41] The French Wikipedia article says the robot has been reproduced in more than 50 countries and is used in many universities, though it gives no source for that figure.[30]
Derivatives and spin-offs
- Community parts. Builders share improved or alternative parts on Thingiverse, such as shoulder covers, holders for square potentiometers and an articulating neck joint; the site links to a Thingiverse collection of them.[21] An adjustable thumb by another builder appeared within six months of the first hand.[25]
- Prosthetic hands. inmoov.fr says the project "has lead to projects like Bionico, E-Nable, and many others".[1] Its news page describes Bionico as a FabLab Rennes project to build a low-cost prosthetic hand for an amputee volunteer.[22]
- Smaller robots. MinMoov is a version scaled to 64 % for people without room for a full-size robot, with smaller servos.[18] Very Mini InMoov is a desktop-sized version with only four servos that can hold a spoken conversation through MyRobotLab.[19]
- New generations by the designer. The i2 Hand (2022), the i2Head with a silicone face (2024) and Eyes i2 (2024) replace or upgrade original parts.[14][15][17]
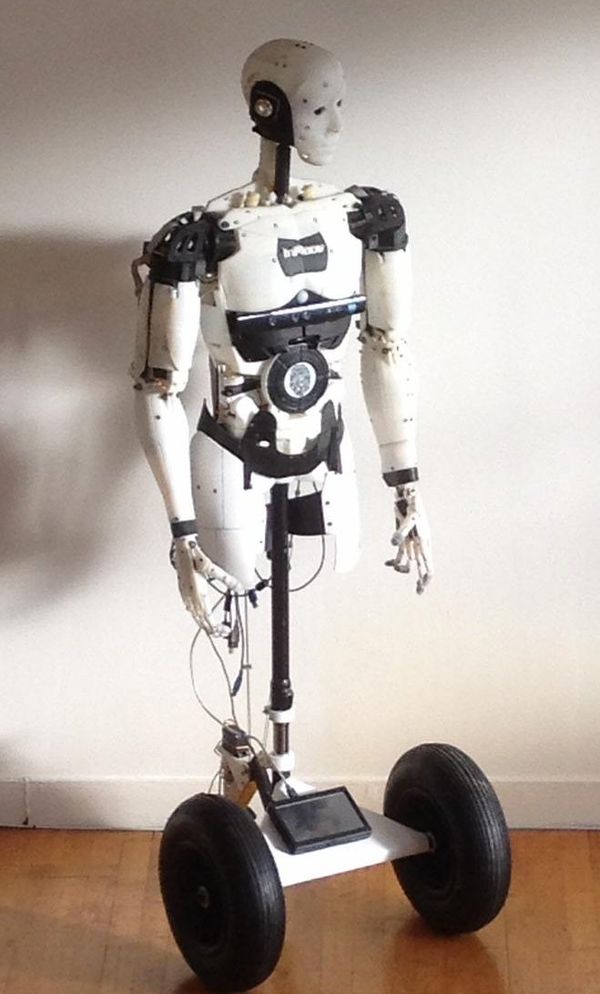
- Mobile bases. Builders have mounted InMoov on wheeled platforms, like the one pictured below.
In public
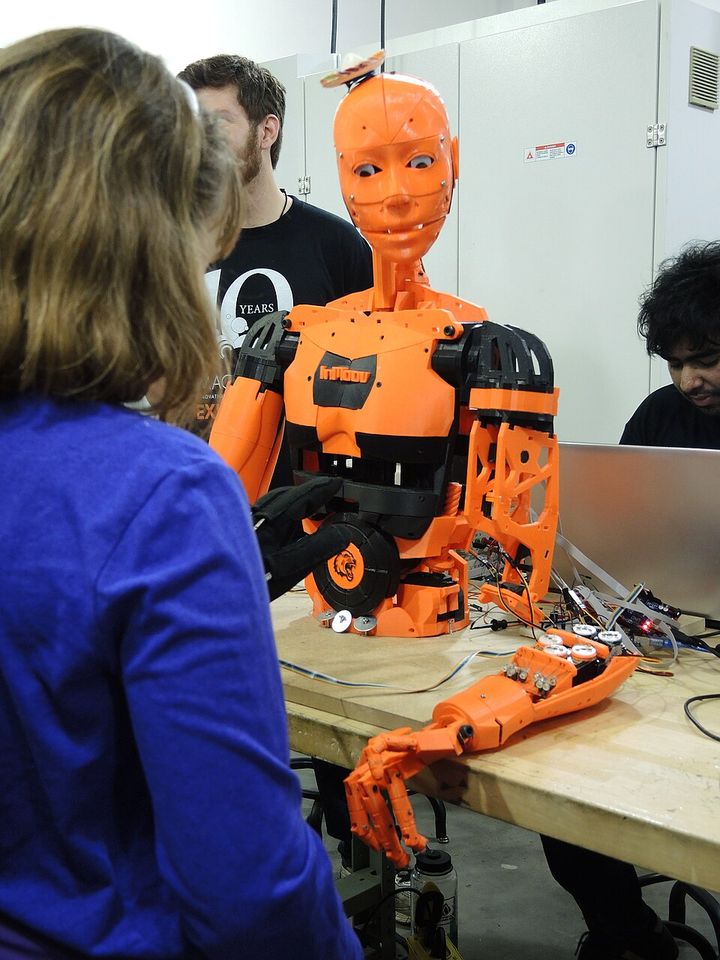
The original robot was shown at Maker Faire Rome in 2013.[29] Since then InMoovs have appeared at maker fairs, science festivals and exhibitions; the photos on this page come from Imagine RIT in the United States (2017) and Maker Faire Berlin (2018). The project's "On the net" page keeps a long, month-by-month list of press articles, videos and events featuring the robot.[22]
For more freely licensed photos, see the InMoov category on Wikimedia Commons. The project's own gallery has many more photos, which are under the project's own terms.
10. What it takes to build one
In short Patience more than expertise. You need a 3D printer, months of spare time, some soldering and hand-tool skills you can learn along the way, and a budget that is likely to run well past a thousand euros (or dollars) for a full robot. Start with a single finger.
Skills
The "build yours" page says: "It does not require particular skills. You will learn making it."[2] In practice, the tutorials ask you to:
- run and fine-tune a 3D printer so that parts fit together (the calibrator part exists for this);[4]
- drill and tap (cut threads in) holes, glue or weld plastic parts, and tie off tendon lines;[5][9]
- solder headers and connectors onto the Nervo Board;[6]
- open the large servos and move their potentiometers onto the joints;[12]
- install and configure MyRobotLab, and set the limits of every servo.[7]
Time
Printing alone is many weeks of machine time (section 7). Assembly and tuning add more: in one comment thread, a builder wrote that he had spent several months on the upper body and was still solving problems.[11] Plan for a long project, built one section at a time.
Cost
The project does not publish a total price, but the Hardware Map parts list (last updated in 2016) gives prices for many items. Adding up the priced lines gives the rough figure below.
| Group | What the list includes | Price (EUR) |
|---|---|---|
| Control boards | 2 × Arduino Mega | 80 |
| Hands and forearms | 10 × HK15298B, 2 × MG996R, braided line, bolts, 1.5 kg ABS | 292 |
| Arms and shoulders | 8 × HS-805BB, bolts, 1.5 kg ABS | 306 |
| Head and torso | 2 × HS-805BB and 3 × HK15298B (at the same unit prices as above), line, bolts, 1.5 kg ABS | ≈ 199 |
| Stomach | 4 × HS-805BB (at the same unit price) | ≈ 120 |
| Power | 6 V 12 Ah battery and charger | 35 |
| Total of priced items | ≈ 1,030 |
This figure is our own arithmetic from the parts list, not a number from the project, and it leaves out a lot: the 3D printer, the Nervo Boards, eye servos, cameras, sensors, speakers, cables, screws and the computer. Prices have also changed since 2016. In 2014, the designer suggested a second-hand small printer for about 300 euros to anyone without one.[3][4] A complete, fully equipped robot will therefore cost noticeably more than the total above; a single hand costs a small fraction of it.
Where to start
- Read the overview pages: Build yours and the Hardware Map + BOM.[2][3]
- Print the calibrator to check that your printer's parts will fit together.[4]
- Build the Finger Starter: one printed finger, one servo and an Arduino Uno. The site says: "If you can do it, you are ready to build a full InMoov robot".[2][5]
- Build a hand and forearm (the site recommends the newer i2 Hand), then try it from MyRobotLab, or explore the virtual InMoov first with no hardware at all.[4][7][14]
- Join the community: register on the site, use the forum or Discord when you get stuck, and add yourself to the builders' map.[2][33][34]
Next in this series: further InMoov pages will look at individual parts of the robot in more detail.
Glossary
- ABS
- A tough printing plastic (acrylonitrile butadiene styrene) that tolerates heat but warps unless printed in an enclosure.
- Arduino / Arduino Mega
- A small, cheap control board built around a microcontroller; the Mega is the large version with many pins.
- Blender
- Free 3D modelling and animation software; InMoov is designed in it.
- Build volume
- The largest size of object a 3D printer can make in one piece.
- CAD
- Computer-aided design: precise engineering drawing software.
- Calibrator
- A small InMoov test print used to check that parts from your printer fit together.
- CC BY-NC
- Creative Commons Attribution-NonCommercial: share and modify with credit, but not for money.
- Depth camera
- A camera that measures how far away things are, such as a Kinect or OAK-D.
- Filament
- The plastic thread, on a spool, that a 3D printer melts to make parts.
- Finger Starter
- InMoov's beginner project: one finger driven by one servo.
- i2 Hand, i2Head, Eyes i2
- Newer redesigned versions of InMoov's hand, head and eyes.
- Infill
- How solid the inside of a printed part is, as a percentage.
- Maker
- A hobbyist who designs and builds things themselves.
- MinMoov
- InMoov scaled down to 64 % of full size.
- MyRobotLab (MRL)
- The free, open-source software normally used to control InMoov.
- NeoPixel
- A brand of LED lights whose colour can be set one by one.
- Nervo Board
- InMoov's own circuit board that sits on an Arduino Mega and organises the servo wiring and power.
- Omoplate
- French for shoulder blade; the InMoov joint that swings the arm out to the side.
- Open source
- Design files published for anyone to study, copy and modify.
- PIR sensor
- Passive infrared sensor: it detects the body heat of a person moving nearby.
- PLA
- Polylactic acid: the easiest common printing plastic; stiff, but softens with heat.
- Potentiometer
- A rotating sensor whose resistance changes with its angle; servos use one to know their position.
- Prosthetic
- An artificial replacement for a missing body part.
- ROS
- Robot Operating System: a widely used set of open-source robotics software libraries.
- Servo motor
- A motor with gears and a position sensor that turns to a requested angle and holds it.
- Shield
- A circuit board that plugs on top of an Arduino to add connections or features.
- Slicer
- The program that turns a 3D model into layer-by-layer instructions for the printer.
- STL file
- The standard file format for 3D-printable shapes.
- Tendon
- On InMoov, the braided line that pulls a finger open or closed.
- Thingiverse
- A public website for sharing 3D-printable designs.
- Torque
- Turning force; for servos usually given in kg·cm.
- Ultrasonic sensor
- A sensor that measures distance by timing echoes of sound pulses.
- XT60
- A common plug for high-current power connections.
Image credits
No photos from inmoov.fr are reproduced on this page. All three diagrams (Figures 1 to 3) are original drawings made for this page. The photos come from Wikimedia Commons, each under the licence shown, and were resized for the web; no other changes were made.
- InMoov head and torso, Maker Faire Berlin 2018: Matti Blume, CC BY-SA 4.0.
- Virtual InMoov in MyRobotLab, 2016: Supertick, CC BY-SA 4.0.
- InMoov at Imagine RIT 2017: DanielPenfield, CC BY-SA 4.0.
- InMoov on a wheeled base, 2015: Hairygael, CC BY-SA 4.0.
The InMoov robot design shown in these photos is by the InMoov designer and is licensed CC BY-NC (see section 8).
Sources
All web pages were checked on 15 October 2026. Dates of tutorial pages are the publication dates recorded by inmoov.fr; Thingiverse dates are the "published" dates on each listing.
- InMoov – home (about the project and its designer). https://inmoov.fr/
- Build yours (overview, printer, servos, skills, where to start). https://inmoov.fr/build-yours/
- Default Hardware Map + BOM (parts list updated 04/05/2016, servo choices, power, computer). https://inmoov.fr/default-hardware-map/
- Hand and Forarm tutorial (parts list, print settings; replies from the designer, 2014 onward). https://inmoov.fr/hand-and-forarm/
- Finger Starter tutorial (and reader comments, incl. a builder's filament and print-time tally, 30 June 2018). https://inmoov.fr/finger-starter/
- Nervo Board tutorial. https://inmoov.fr/nervo-board-tutorial/
- HOWTO Start MyRobotLab. https://inmoov.fr/how-to-start-myrobotlab/
- Neck and Jaw tutorial. https://inmoov.fr/neck-and-jaw/
- Eye Mechanism tutorial. https://inmoov.fr/eye-mechanism/
- Legs Non Motorized tutorial. https://inmoov.fr/legs-non-motorized/
- Shoulder and Torso tutorial (and reader comments). https://inmoov.fr/shoulder-and-torso/
- Bicep tutorial. https://inmoov.fr/bicep/
- Back covers tutorial. https://inmoov.fr/back/
- Hand i2 tutorial. https://inmoov.fr/hand-i2/
- i2Head for InMoov. https://inmoov.fr/i2head-for-inmoov/
- Head i2 tutorial (parts, moulds, servos). https://inmoov.fr/headi2/
- Eyes i2 tutorial. https://inmoov.fr/eyes-i2/
- MinMoov 64 reduced. https://inmoov.fr/minmoov-64-reduced/
- Very Mini InMoov. https://inmoov.fr/very-mini-inmoov/
- InMoov with ROS. https://inmoov.fr/inmoov-with-ros/
- InMoov parts and derivatives. https://inmoov.fr/inmoov-parts-and-derivatives/
- On the net (news, press and events list). https://inmoov.fr/on-the-net/
- Thingiverse: “Hand robot InMoov” by the InMoov designer, thing:17773 (published 18 Feb 2012; CC BY-NC 4.0). https://www.thingiverse.com/thing:17773
- Thingiverse: “Left Hand robot InMoov”, thing:18939 (published 11 Mar 2012). https://www.thingiverse.com/thing:18939
- Thingiverse: “Adjustable thumb for InMoov” by Anar, thing:28124 (published 7 Aug 2012). https://www.thingiverse.com/thing:28124
- Thingiverse: “Stand Holder for InMoov”, thing:44452 (published 25 Jan 2013). https://www.thingiverse.com/thing:44452
- Thingiverse: “InMoov eye mechanism”, thing:86387 (published 9 May 2013). https://www.thingiverse.com/thing:86387
- Thingiverse: “Neck Tilting for InMoov”, thing:2605676 (published 25 Oct 2017; CC BY-NC-SA 4.0). https://www.thingiverse.com/thing:2605676
- Wikipedia (English): InMoov. https://en.wikipedia.org/wiki/InMoov
- Wikipédia (French): InMoov. https://fr.wikipedia.org/wiki/InMoov
- MyRobotLab source code and documentation (GitHub). https://github.com/MyRobotLab/myrobotlab
- Creative Commons: Attribution-NonCommercial 4.0 International (CC BY-NC 4.0) deed. https://creativecommons.org/licenses/by-nc/4.0/
- InMoov forums. https://inmoov.fr/forums/
- InMoov Discord server. https://inmoov.fr/discord-server/
- InMoov gallery. https://inmoov.fr/gallery-v2/
- InMoov STL parts library. https://inmoov.fr/inmoov-stl-parts-viewer/
- Top Stomach tutorial. https://inmoov.fr/top-stomach/
- Mid Stomach tutorial. https://inmoov.fr/mid-stomach/
- Low Stomach tutorial. https://inmoov.fr/low-stomach/
- Logic and Pinout (MyRobotLab servo names and gesture commands). https://inmoov.fr/logic-and-pinout/
- InMoov community. https://inmoov.fr/community-v2/
- InMoov shop. https://inmoov.fr/shop/